Running a React Native App on iPhone 2024 guide
— React Native — 4 min read
This tutorial will guide you through the process of running a React Native app on an physical device not on a simulator, event if is your first time doing it. I hope it helps!
Table of contents
- Prerequisites
- My environment
- Enable developer mode on iPhone
- Prepare iPhone to run the app
- Managing devices, developer certificate and provision profile in your Apple account
- Installing iOS deploy
- Building the app
Prerequisites
- ⚠️ First of all, make sure you to have the React Native environment setup already
- Access to the Apple Developer account
My environment
Some parts of this guide may vary depending on your environment, such as Xcode version or macOS version. Here is the environment I used to run the app on my iPhone:
- macOS Sonoma 14.1.1
- Xcode Version 15.0.1
- node v18.19.0
- React Native v0.74.3
- iPhone 11 - iOS Version 17.5.1
- Homebrew 4.3.12
Enable developer mode on your iPhone
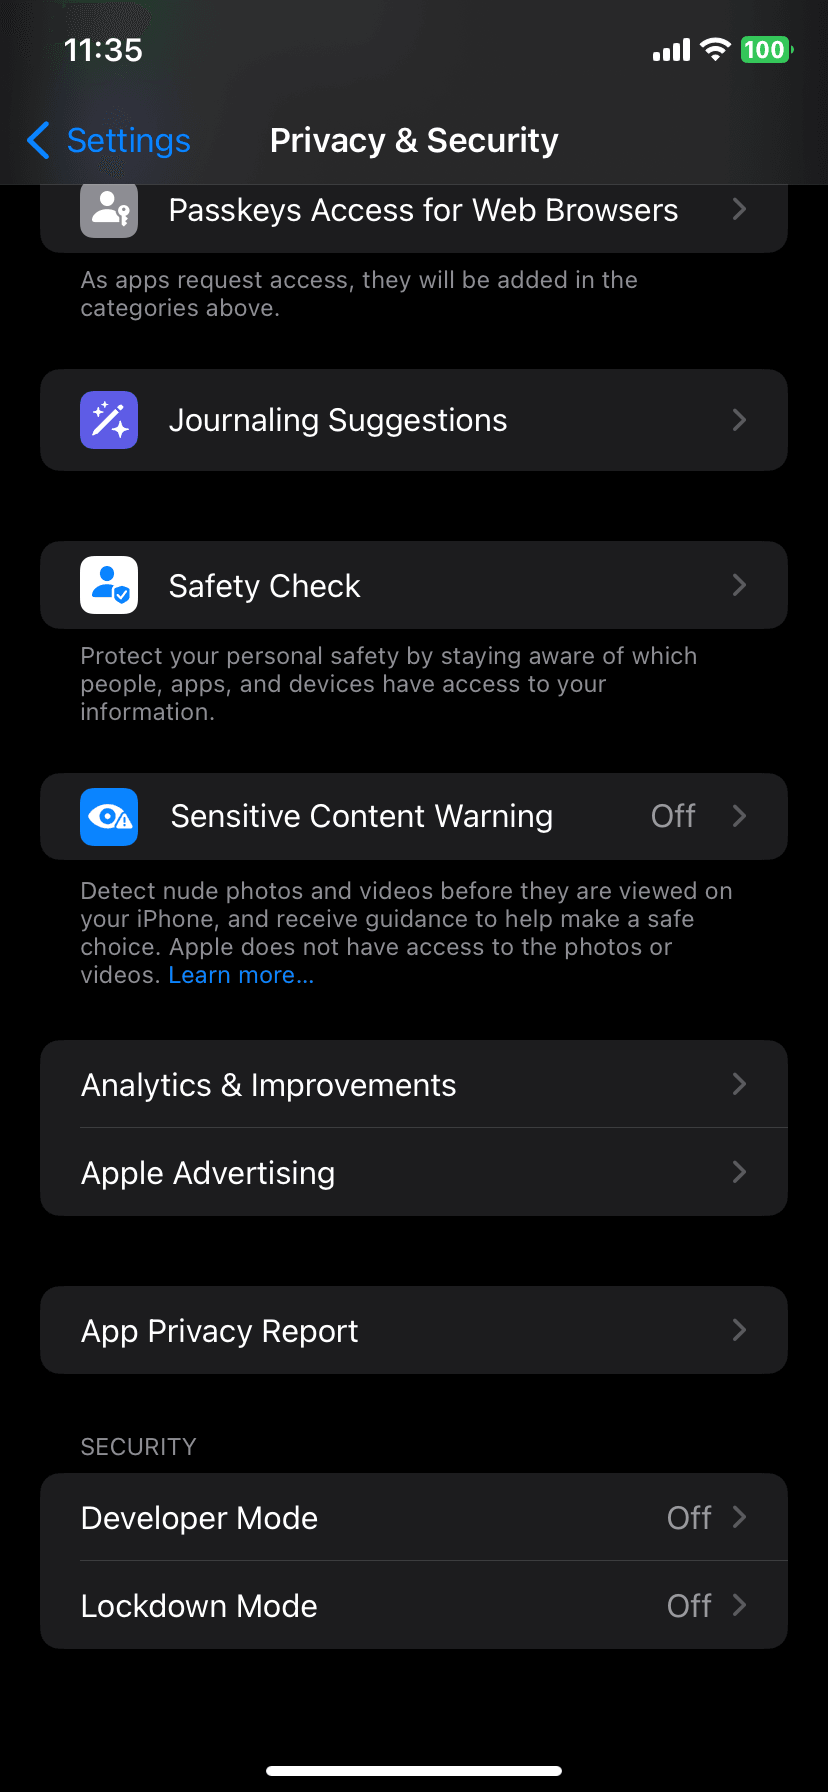
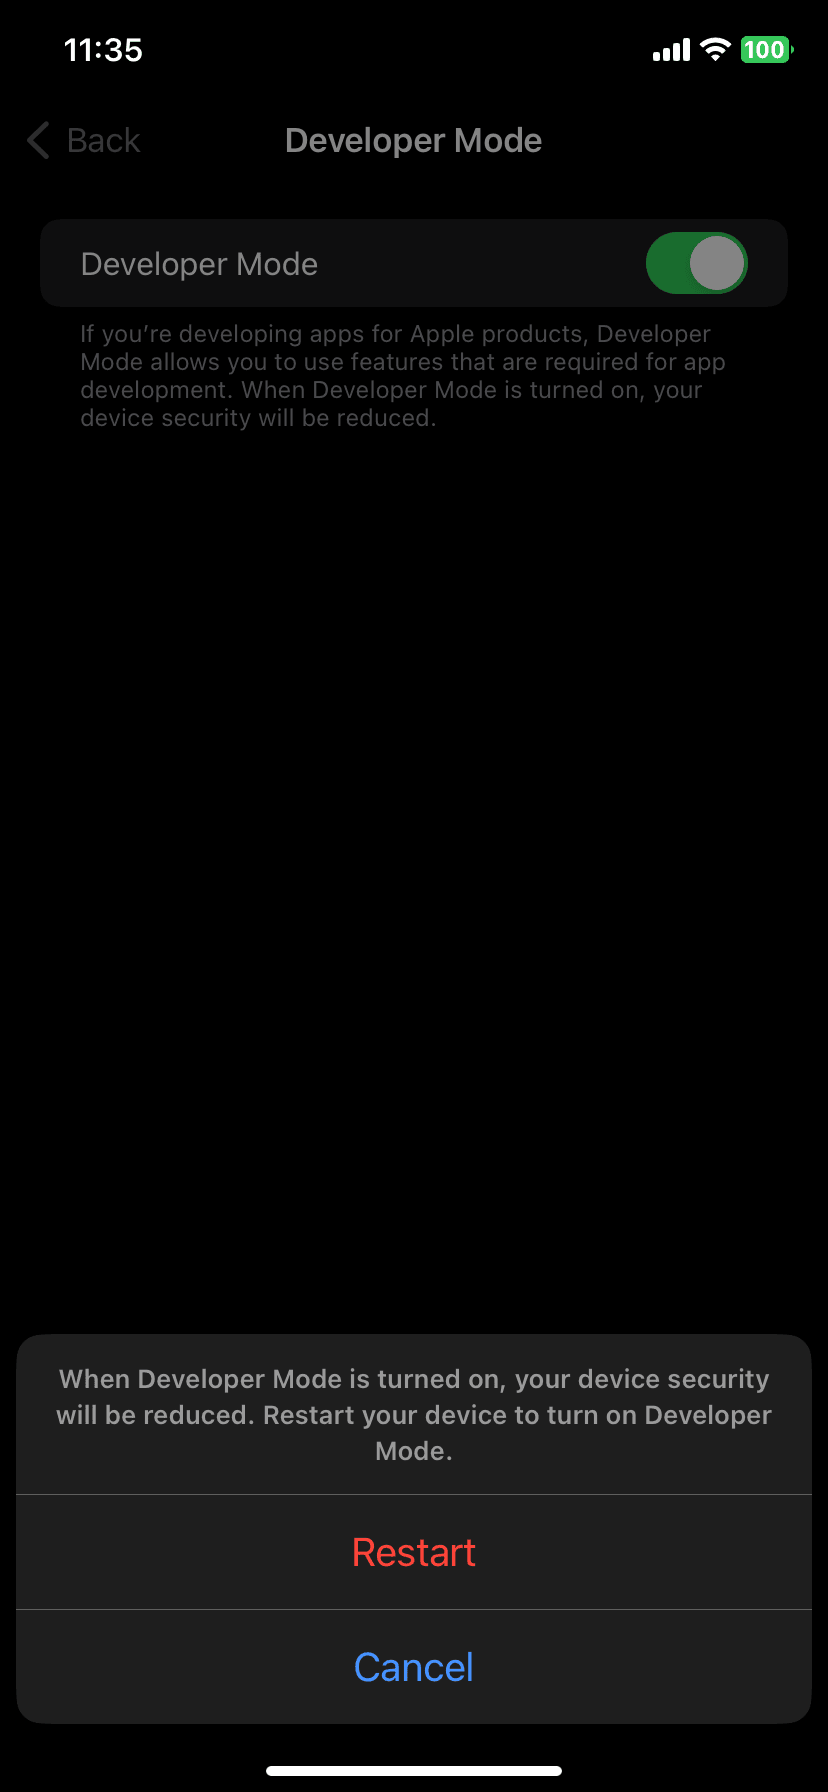
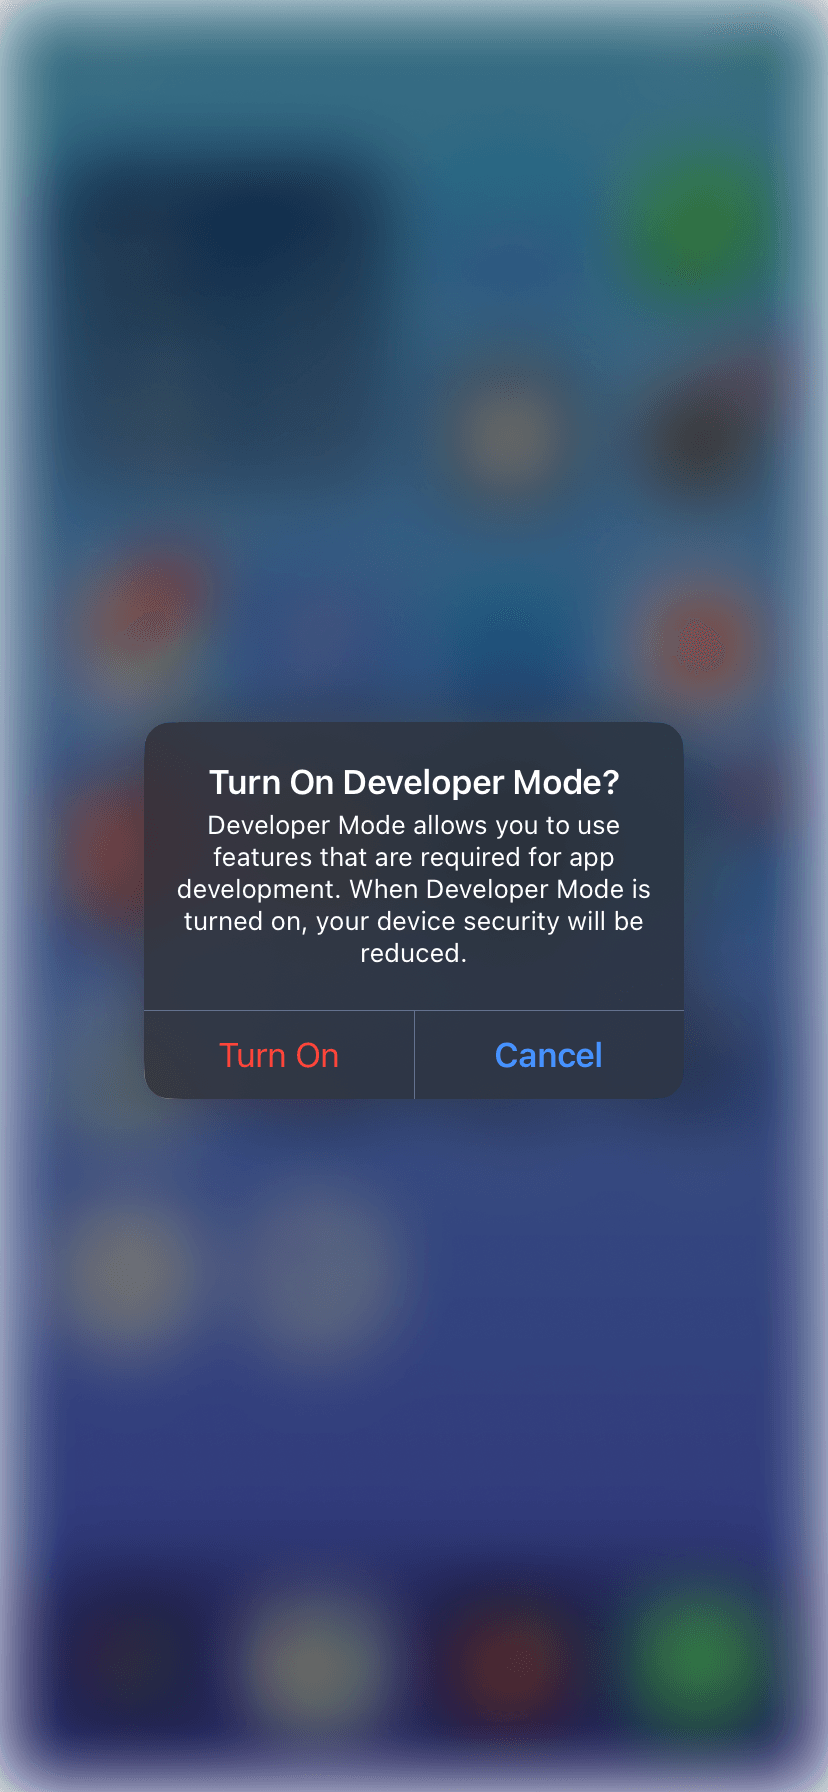
Open the settings app on your iPhone and go to Settings > Privacy & Security > Developer Mode and enable it. Tap Restart to continue. After the restart, you should see a popup to confirm that you want to enable developer mode. Tap Turn On.
| Find "Developer Mode" | Enable the switch and tap Restart | Tap Turn On |
|
|
|
✅ Now you have successfully enabled developer mode on your iPhone.
Prepare iPhone to run the app
Open Xcode, look for the Window menu and click on Devices and Simulators. Now connect your iPhone to your computer using a USB cable.
If is the first time you are connecting the iPhone in your computer you should see a popup on your iPhone asking you to trust the computer. Tap Trust.
After that you should see the iPhone in the Devices tab.
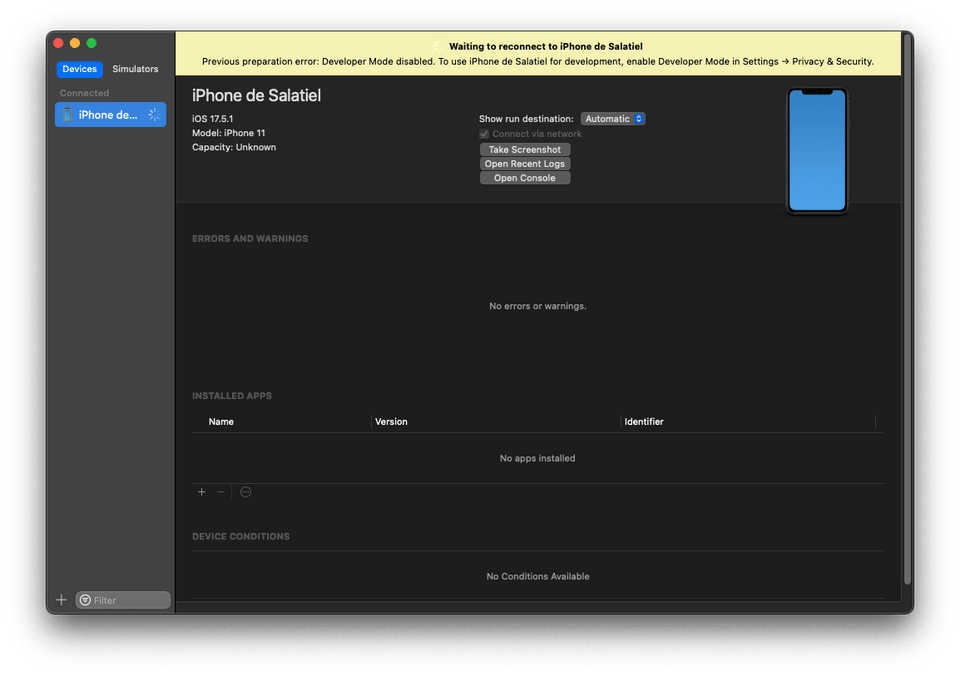
⚠️ If you connect your iPhone before enabling developer mode you probably will this the following messege in the Devices window:
Waiting to reconnect to iPhone. Previous preparation error: Developer Mode disabled. To use iPhone for development, enable Developer Mode in Settings → Privacy & Security.
So enabled developer mode on your iPhone before connecting it to your computer.
Another common issue is when your computer and your iPhone are not connected to the same network. If that happens you will see the following message:
Ensure the device is unlocked and attached with a cable or associated with the same local area network as this Mac. The device must be opted into Developer Mode to connect wirelessly.
So, make sure your iPhone is connected to the same network as your computer.
Usually you should see the following screen. That means Xcode is copying the required files to your the app on your iPhone. This step is completed automatically.
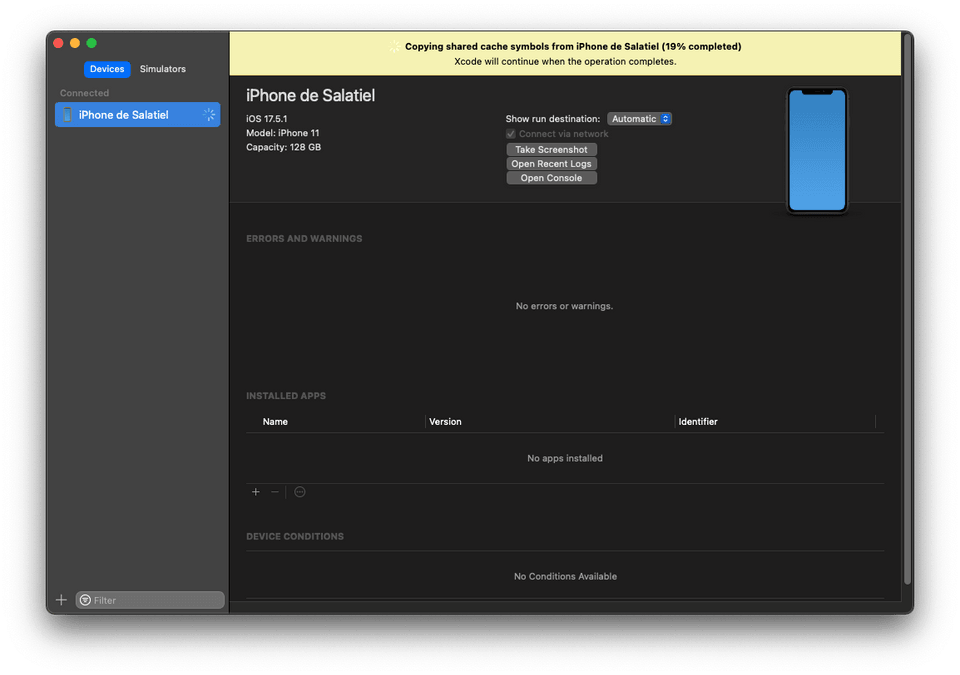
It may take a few minutes to complete but sometimes, as it happed to me, that the process got stuck. If that happens disconnect you device and try cleaning the Xcode cache and build files. You can do that by running the following command in the terminal:
1npx react-native-clean-projectAfter cleaning, reconnect your iPhone and try again.
That solved the issue for me and after a few minutes I could see the following screen:
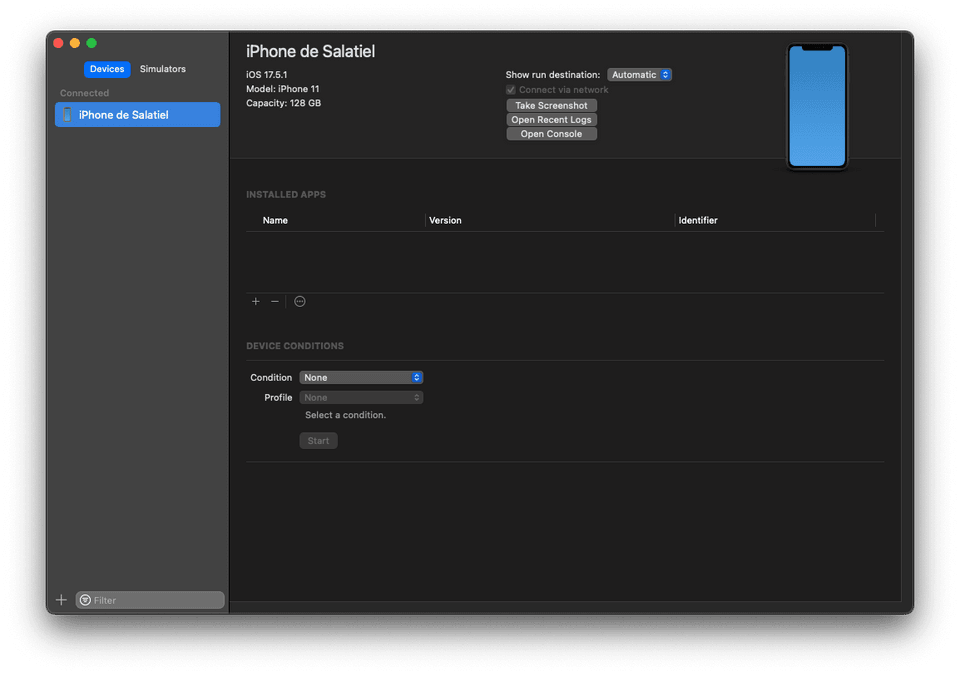
✅ If you see this screen, you are ready to run the app on your iPhone.
Managing devices, developer certificate and provision profile in your Apple account
There are several steps to do in your Apple account to be able to run the app on your iPhone. First you need to get the device UDID, then you need to register the device in your Apple account, after that request a certificate from authority and create a new development certificate.
So here is a step by step guide to do that:
Get iPhone UDID and register device
UDID is short for Unique Device Identifier so with your iPhone connected to your computer, open Devices and Simulators in Xcode and copy the Identifier located right bellow the serial number

Register a new device
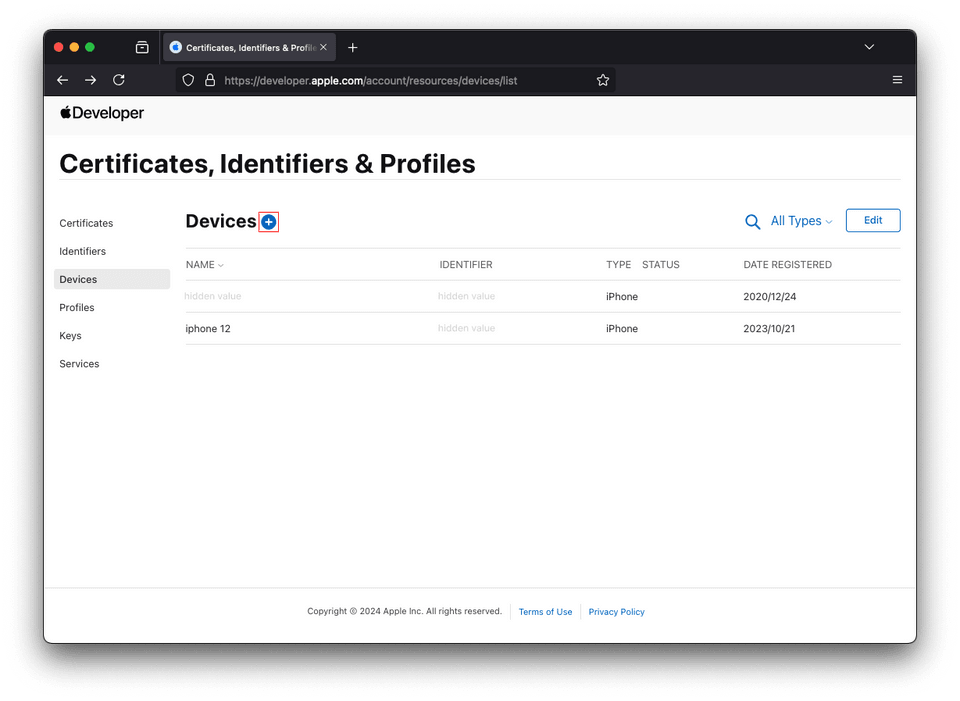
- Go to your Devices list inside your Apple Developer account and click on Devices in the left menu. Click on the + button to add a new device.
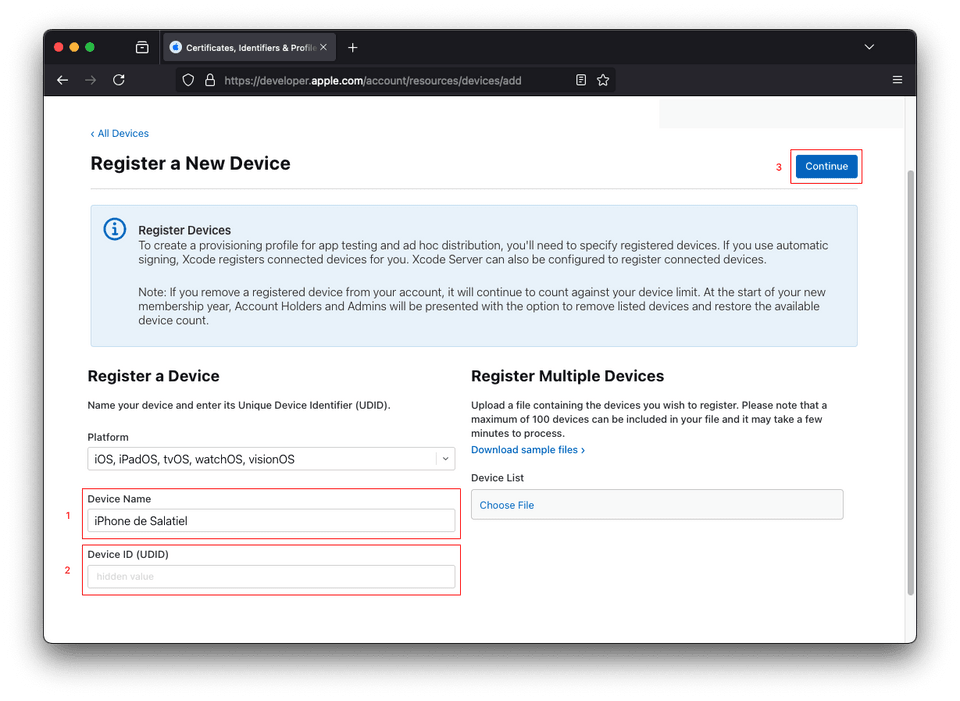
- On the Register a New Device page, enter the Device Name and Identifier and click Continue.
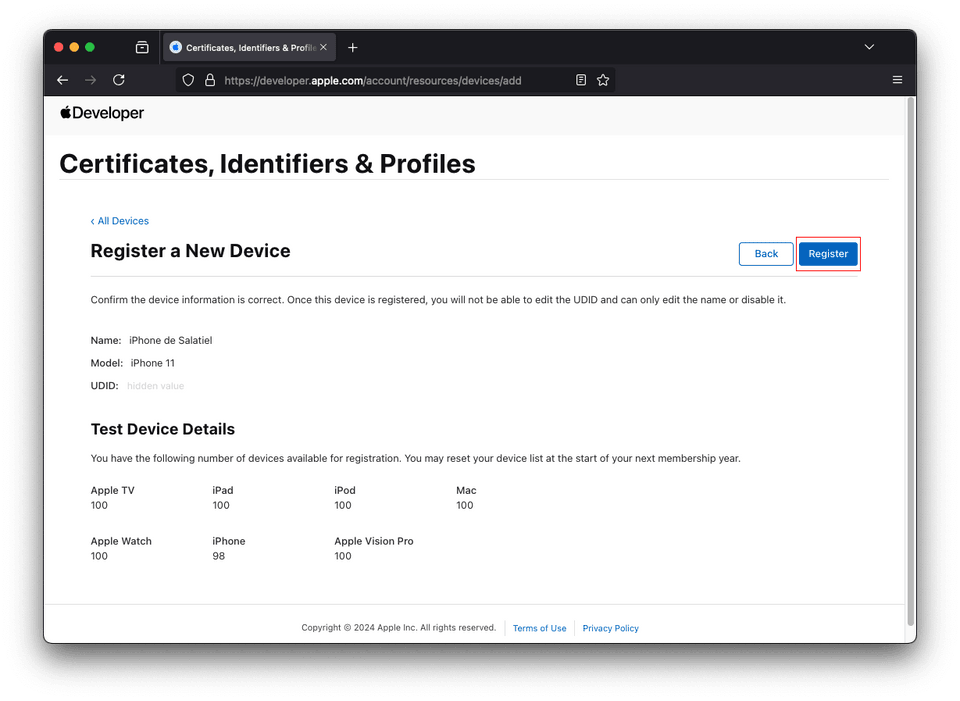
- Review the information and click Register.
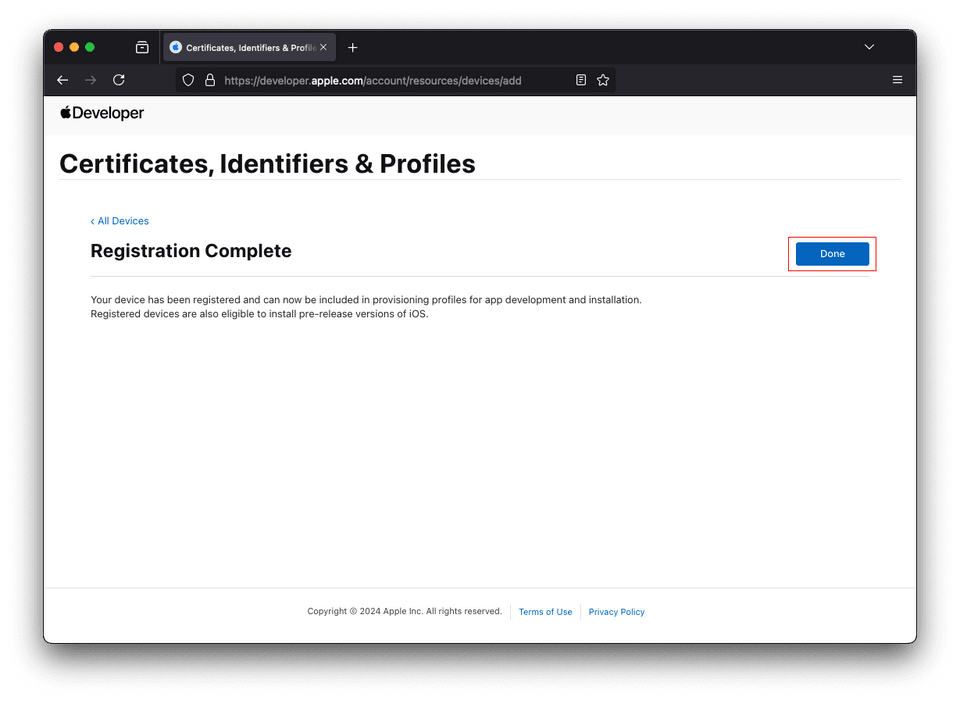
- On the registrattion complete screen, click Done.
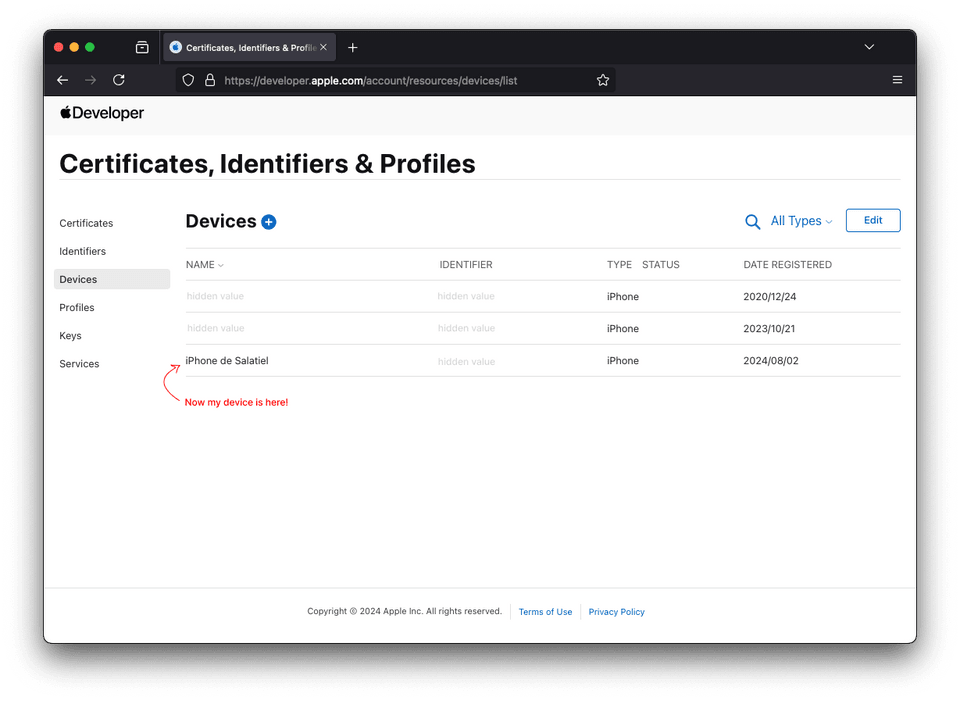
- Now you should see the new device in the list of devices.
For the dark mode folks, the nexts screenshots will be in light mode ~MY EYES~
Create a iOS development certificate
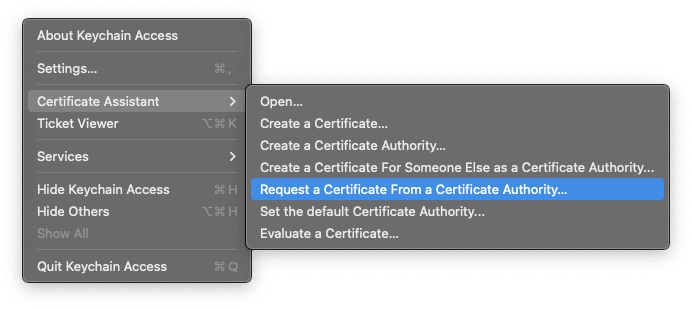
Before creating a certificate you need to create a Certificate Signing Request (CSR) file. Open your Keychain Access app and go to Keychain Access > Certificate Assistant > Request a Certificate from a Certificate Authority. Enter your email and name and select Save to disk.
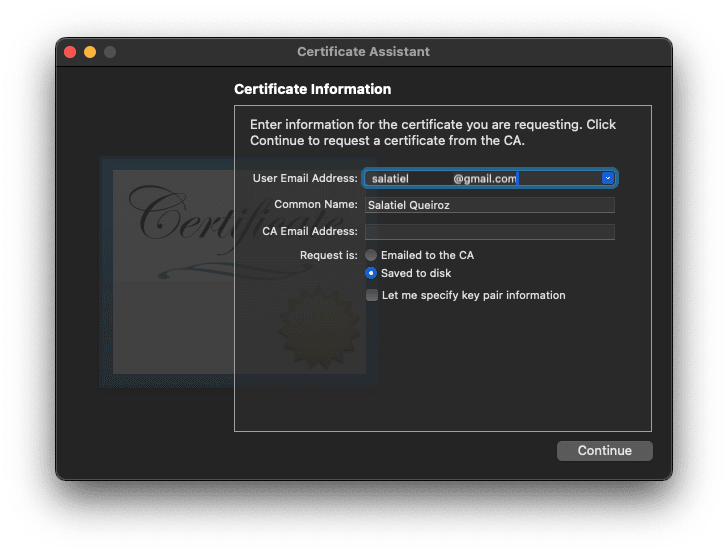
Steps to create a the iOS development certificate:
- Go to Certificates, Identifiers & Profiles in your Apple Developer account.
- Click on Certificates in the left menu and then click on the + button to add a new certificate.
- Upload the Certificate Signing Request (CSR) file you created using the Certificate Assistant in the previous step and click Continue.
- Download the certificate and double click on it to install it in your Keychain Access app.
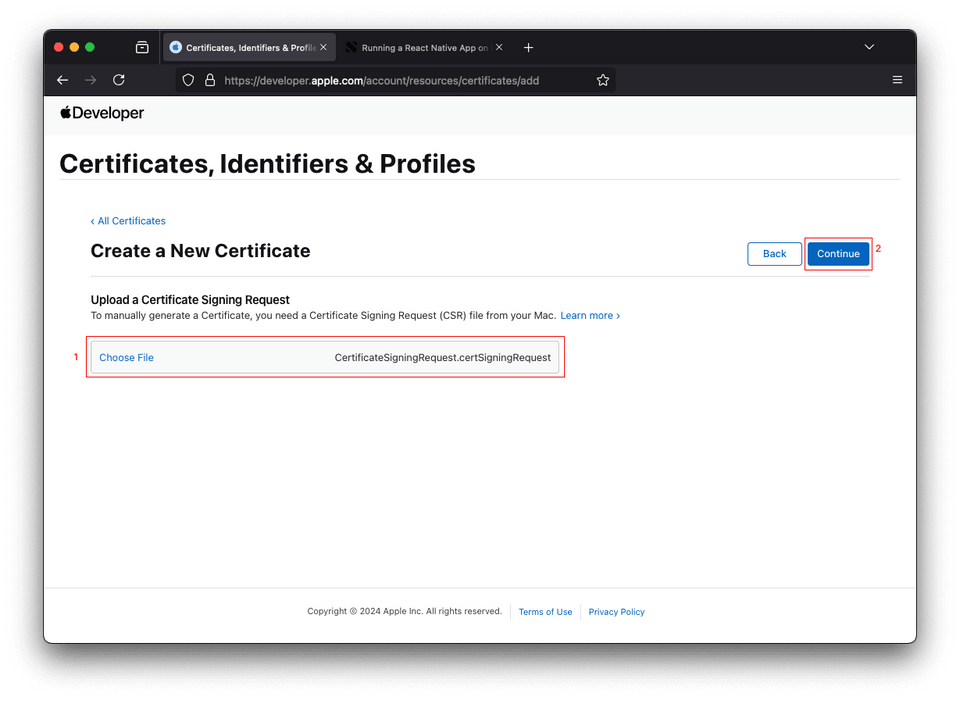
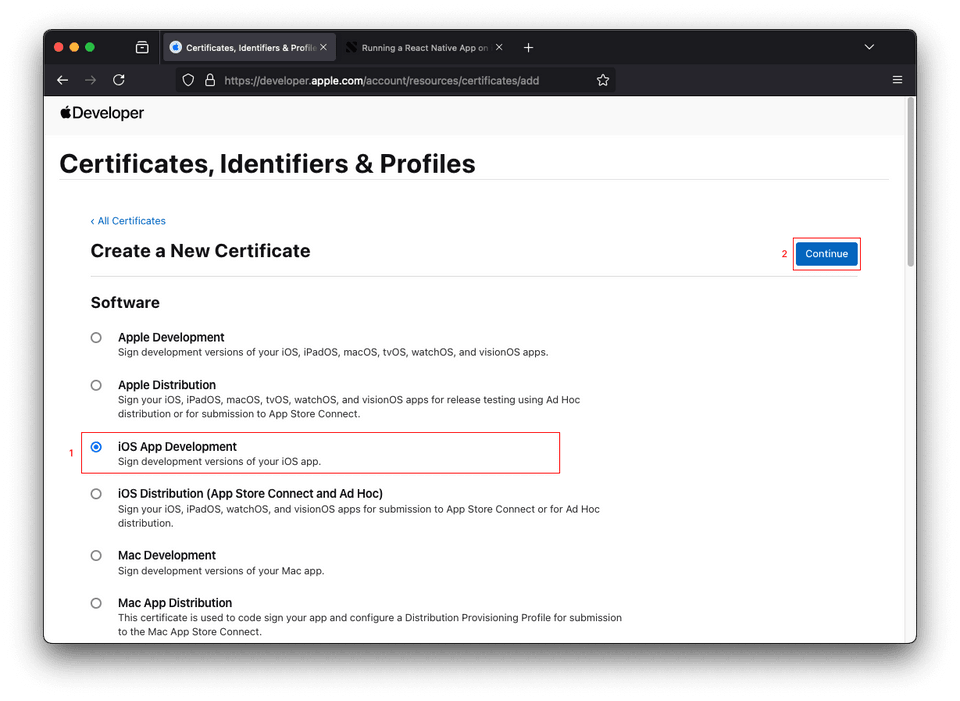
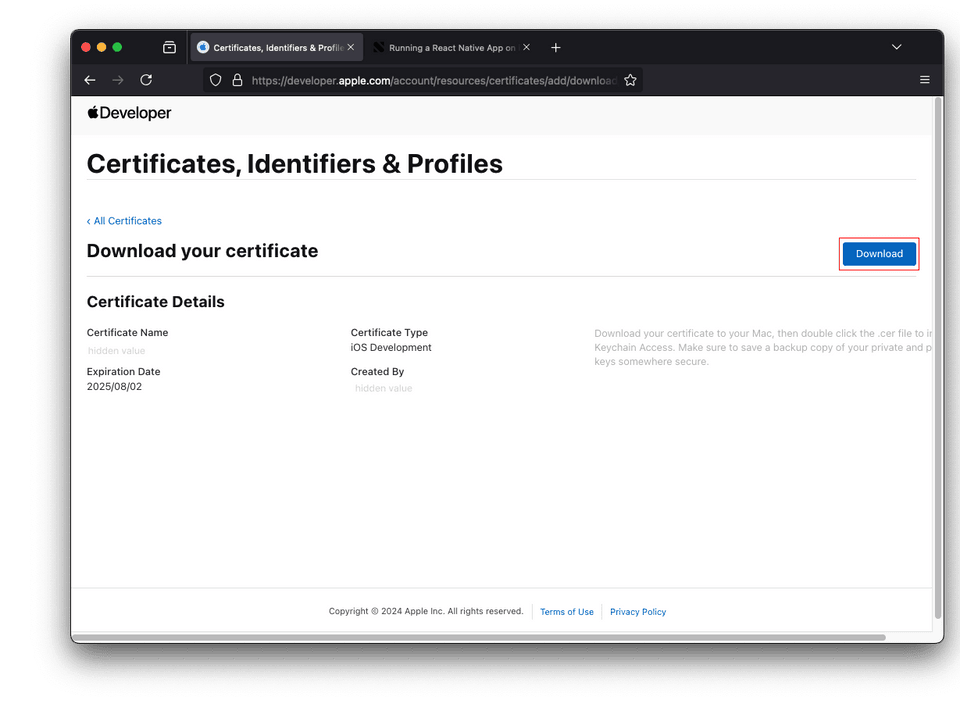
Update Provision Profile
Now, you have a new device registered and a new development certificate. The Provision Profile is what glues the two together.
This will be the last step that need to be done in your Apple account. (Finally!)
- Go to Provisioning Profiles
- Click on the plus button to create a new profile
- Select iOS App Development and click Continue
- Select an app ID and click Continue
- Select the iOS certificate you created in the previous step and click Continue
- Select the device you registered previously and click Continue
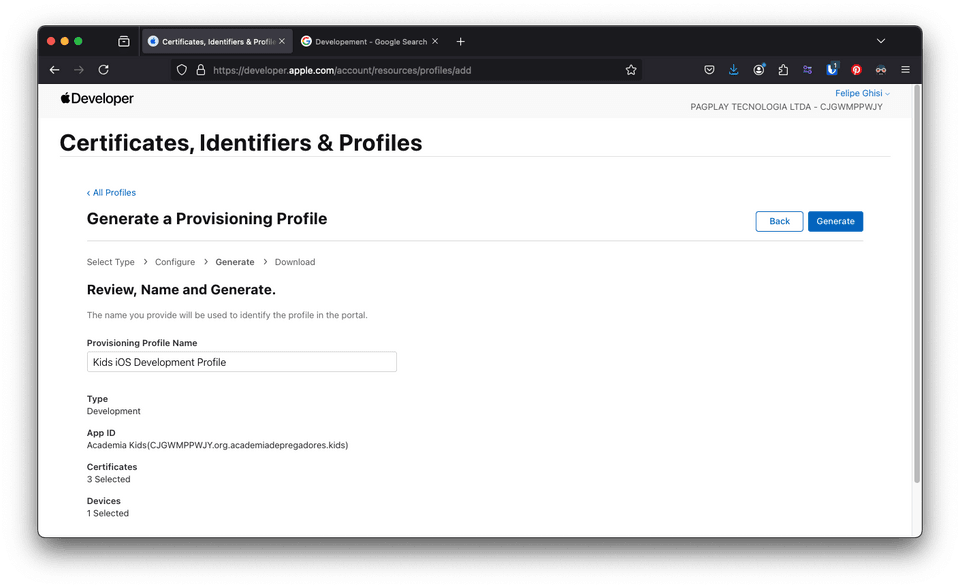
- Give a name to the provisioning profile and click Generate
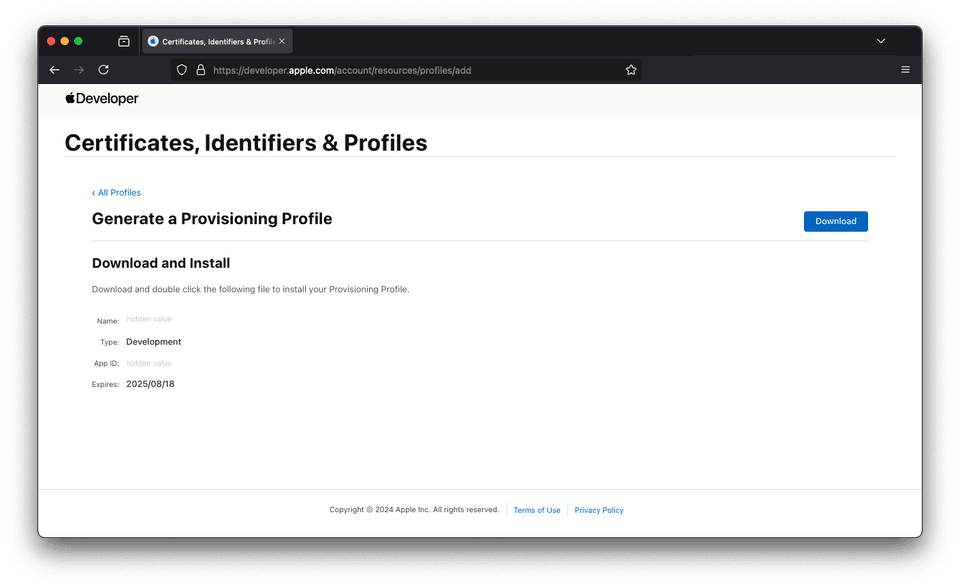
- After the profile is generated click Download
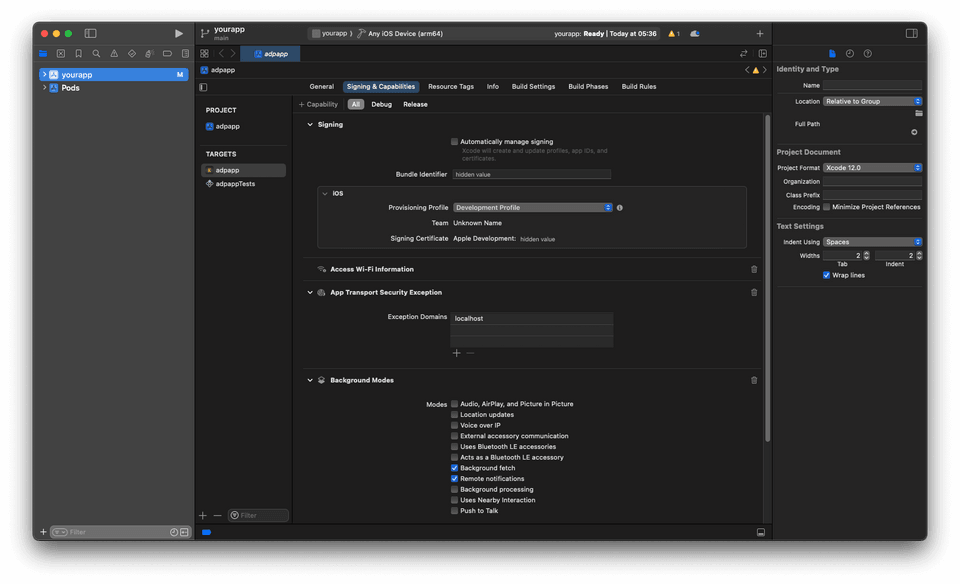
- Open the Xcode project, go to your app target and select the Signing & Capabilities tab. Under Signing, import the provisioning profile you just downloaded.
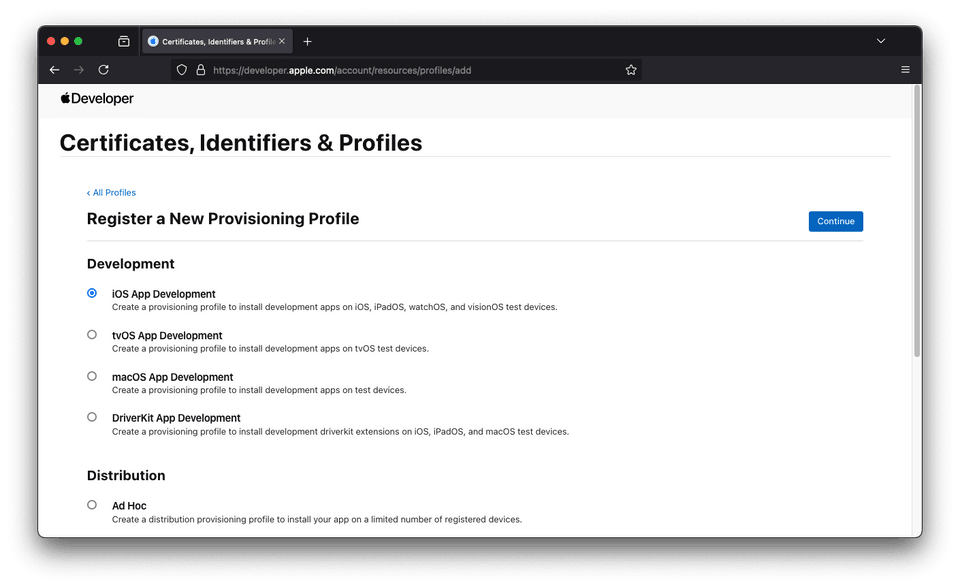
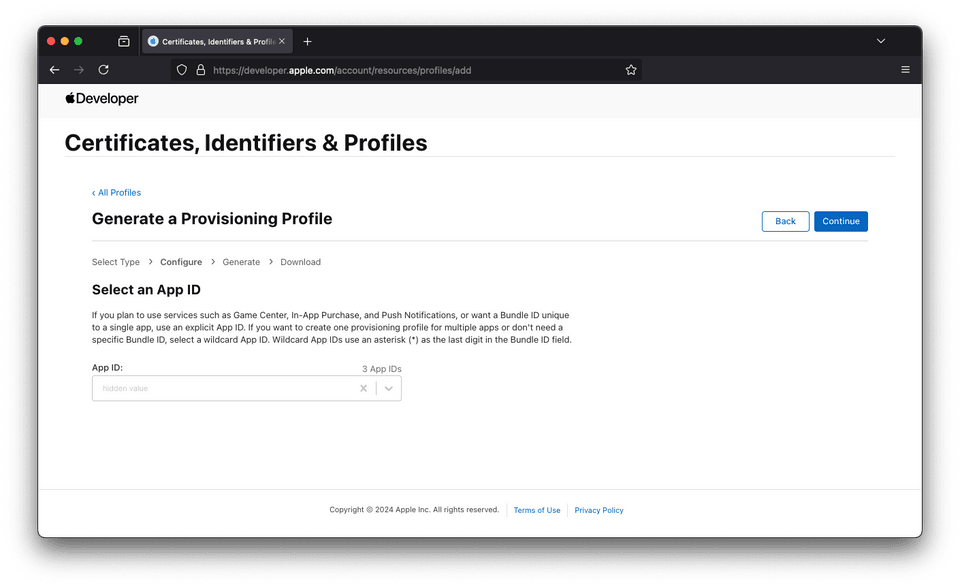
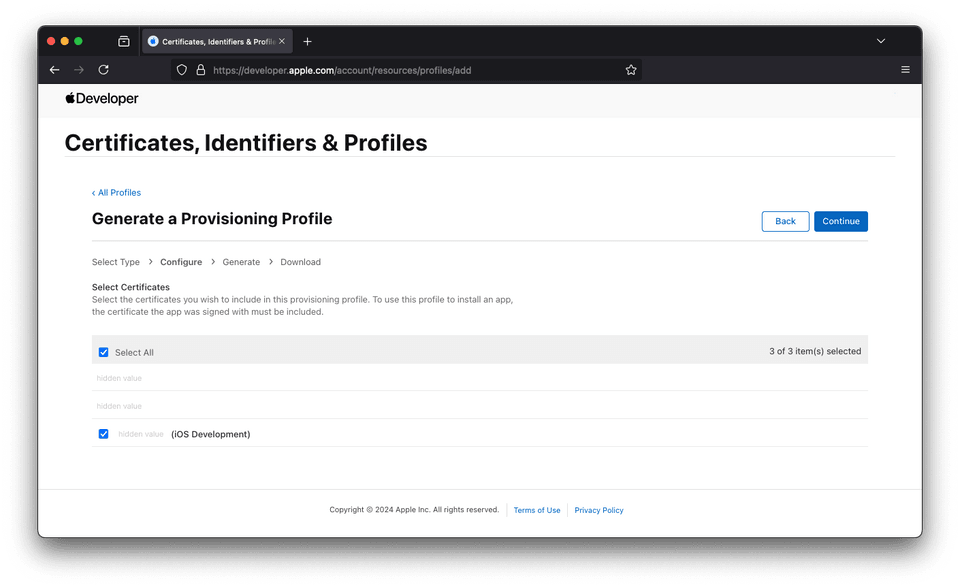
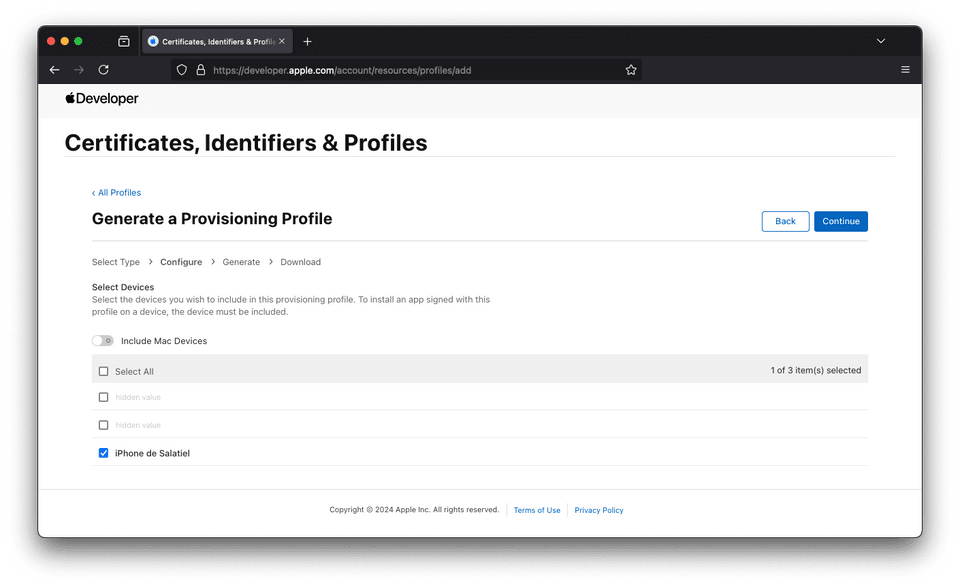
Be sure that after importing the provisioning profile in your Xcode project it shows no error messages. Here is an example of how it should look like:
Installing iOS deploy
Depending on your iPhone OS version you need to install ios-deploy CLI. Please follow the instructions on the ios-deploy GitHub page to install it.
But if you are using Homebrew you can install it by running the following command:
1brew install ios-deployBuilding the app
Finnaly, you can to your React Native project and build the app by running the following command in the terminal:
1npx react-native run-ios --device='YOUR IPHONE NAME'You can pass scheme and mode as well. Here's an example:
1npx react-native run-ios --device='iPhone de Salatiel' --scheme='Development' --mode='Debug'Hopefully you will see the following output after the build is completed:
1> info Found Xcode workspace "Runner.xcworkspace"2> info Building (using "xcodebuild -workspace Runner.xcworkspace -configuration Debug -scheme Development -destination id=00000000000000")3> success Successfully built the app4> info Installing and launching your app on iPhone de Salatiel5> success Installed the app on the device.coreAnd you should see the app running on your iPhone.